When preparing any surface for painting, it is important to pay attention to the condition of the surface and to thoroughly clean it before beginning.
Preparation Steps
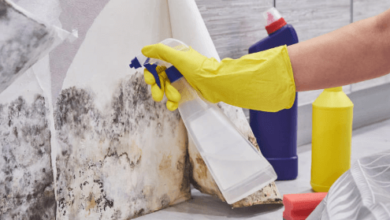
The first step in preparing a surface for painting is to inspect the area for any damage or defects that may need to be repaired before applying paint. Experts ADA Fastfix state that this includes checking for holes, cracks, and dents in the wall, as well as looking for signs of water damage or mold. Once these issues have been addressed, any flaking paint should be scraped off.
The next step is to wash the entire surface with a mild detergent and warm water solution. Use a soft-bristled brush or sponge to scrub away any dirt or debris that may have accumulated on the walls, paying particular attention to corners and crevices where dust and grime tend to accumulate. Rinse off the cleaning solution with water once you’re finished.
Once the wall has dried, use sandpaper or steel wool to scuff up any glossy surfaces so that they will accept paint better. Sanding should be done in small circular motions until all glossy areas are dulled out. Vacuum away all dust particles after sanding is complete. After vacuuming, wipe down the entire surface with a damp cloth or rag and then let it dry completely before beginning your painting project.
Lastly, depending on what type of material you are painting on—wood, concrete, drywall—you may need to apply a primer coat before adding the paint colours of your choice. Primer helps create an even base coat so colours stand out more vibrantly and look more uniform when applied overtop of it; it also seals porous surfaces like wood so that paint does not soak in too deeply and cause bubbling later on down the line. Be sure to follow all instructions on the primer’s packaging before using it and work carefully near windowsills or other areas where drips might occur if too much primer is used at once!
What is the Best Way to Sand Wood Before Painting?
The best way to sand wood before painting is to use 180-grit sandpaper and move along the grain of the wood with long, even strokes. If the surface has several layers of paint or varnish or if it is glossy, start with 80-grit sandpaper for better results. After that, switch to 120-grit and then finish off with 180-grit for a completely smooth surface. Make sure you wipe away any dust from the sanding process with a damp cloth before painting. Keep in mind that when doing detailed work such as hand railings or trim pieces, you may need to go down to a finer grit depending on how smooth you want the final result.
Additionally, if there are any imperfections in the wood, you can use a router or chisel to make them level. This will ensure that when you paint, your surface is even and that the paint will stick properly. Be sure to sand away any splinters or raised grain with some fine-grit sandpaper after this. Once these steps are complete, you can start painting.
For metal surfaces, sanding is also necessary to ensure a uniform finish and for the paint to adhere properly. Start with 80-grit sandpaper and work your way up to 180-grit. You may need to use higher grits depending on the surface of the metal and how smooth you would like it to be. After sanding, use a wire brush to remove any rust or corrosion, and then wipe away dust with a damp cloth. Finally, you can apply your primer coat before painting.
In summary, preparing a surface for painting is an important step in any painting project. It’s essential to properly clean and sand the area before applying primer and paint so that you ensure the best possible results. There are several types of primers available depending on your specific needs, from latex-based to oil-based varieties. Once you’ve chosen the right kind of primer for your job, it’s time to apply it with a brush or roller and let it dry completely before adding colour. Taking these steps will help create beautiful walls that last!