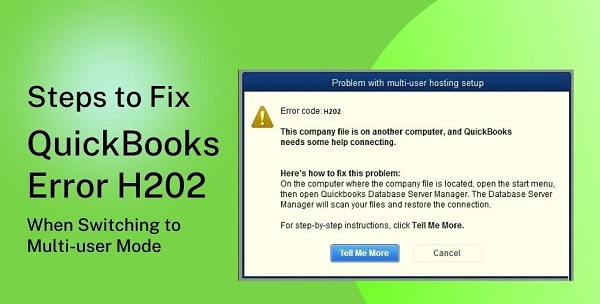
QuickBooks Error H202 is displayed when the user attempts to switch to QuickBooks Multi-User Mode. This error indicates that the company file is located on another computer and needs assistance to connect. This error prevents users from accessing company files located on other computers. Read More
It can be difficult to fix QuickBooks error code H202. We are here to help. We are here for you. We’ll show you how to fix QuickBooks error H202. This will allow you to fix the error.
What are the Symptoms of QuickBooks Error H202?
- You will see the error message H202 QuickBooks on your screen.
- QuickBooks users cannot switch to multi-user mode.
- QuickBooks freezing may be a possibility.
- Your system can become inactive.
- The company file cannot be opened by the user from another computer.
What Are the Causes of QuickBooks Error H202?
- Below, we discuss the possible causes of “QuickBooks error H202”:
- It is possible that you are unable to use QuickBooksDBXX or QBCFMonitor.
- The Hosting settings have not been configured.
- Due to firewall Software blocking the user’s ability to exchange data between servers/QuickBooks, the user cannot do so.
- Because DNS settings have not been set up.
- The IP address for the server is not available.
- QuickBooks services like QuickBooksDBXX and QBCFMonitor do not work.
- Contact us if you have any questions about the QB Database Server Manager.
- A “QuickBooks error H202” could also be caused by corruption or damage to the.ND file.
Troubleshooting methods to resolve QuickBooks Error H202
To get rid of the QuickBooks Error Code H202, you just need to follow these steps:
Method 1: Check the Network Connection.
- First, you must enable Hosting at all workstations.
- From your workstation, click on the server name.
- Enter your server name.
Method 2 – Install the Network Diagnostic Tool
- Run the QuickBooks Network Diagnose Tool.
- Search the folder containing the company file.
- Note the IP address.
- To enable QuickBooks ports, click on Open Ports
- Verify the file connectivity.
- File to relaunch the company.
- If you still have the QuickBooks Error Codes H202, please add the QuickBooks port in the Windows Firewall to the exceptions.
For more interesting blogs, Please Visit royal texture
Method 3 – Create a new folder to store the company file
- Create a folder.
- Share The Folder
- Set up Windows Access and Folder Permissions to share company files.
- Launch The company file is now in multiuser mode.
Method 4 – Install and Run the QuickBooks File Doctor Tool.
QuickBooks file doctor can diagnose and troubleshoot various types of QuickBooks errors, including the QuickBooks error code H202. This tool can be downloaded and installed to fix the error. It will then automatically detect and resolve error H202.
Method 5: Create the. ND company must file again.
- Enter the. Enter ND into the windows search field.
- Right-click on the.ND file to delete
- When the confirmation window appears, click on Confirm.
- Select Windows now.
- Select All Programs, and then select Quickbooks.
- Select the QuickBooks Database Server Administrator.
- Select the Scan folder.
- Select the Folder to browse the company folder.
- Select the company and click OK.
- After you’re done scanning, click on close.
Method 6 – Locate local hosting.
- Open QuickBooks.
- To open the Product Info, select F2.
- Select Hosting to only follow the local files.
- You should ensure that the company file is not hosted by another client.
Method 7: Save the server in the Windows Host File.
- Start the Windows hosts and save it to the computer.
- C:\Windows\System32\Drivers\Etc\ through Notepad.
- If necessary, launch Notepad and log in as Administrator.
- Enter the server IP address. Locate the insert point.
- Type the server address into the Tab key.
- Select Save from the File menu. Next, click on Exit.
- Now, launch your company file.
Method 8 – Relaunch the SQL Database Server Manager.
- Start Windows, Run, and then write.
- Click on OK.
- Right-click the files QuickBooksDB17 (2007) and QuickBooksDB18 (2008). Choose Stop.
- Select start to close the Windows.
- Present Extensions for “known files types”.
- Select the View tab, and then choose Hide extensions for the most commonly used file types.
- Click the View tab once more and choose Show hidden files and folders, and delete Hide protected operating systems files.
- Select Yes in the warning message, and then press OK.
- Close the Windows Explorer.
Method 9 – Check QuickBooks Services.
- Start QuickBooks on the server.
- Go to the utility by selecting Files.
- Select Multi-user access.
- Follow the steps below to verify the status of QuickBooksDBXX or QBCFMonitorService:
- Start the Windows. Type smsc into the text file.
- Click OK.
- Select QBXX and press OK.
- Search for the Startup type.
- Make sure the startup type is Auto, If not, turn it on Automatic.
- Look for the Status to verify that it is active.
- Service status.
- Start the Recovery tab, and then press OK.
- Choose ” Restart-Service” for the first, second, and subsequent failures.
- Select Apply > OK.
- For QBCFMonitorService, repeat the steps above.
Method 10 – Check your Firewall Settings.
- Make exceptions within the firewall.
- Modify the permissions within the firewall.
- All workstations can be launched QuickBooks
- Finally, choose the multi-user mode in the file menu.
Conclusion
We have provided all possible solutions to the error h202 QuickBooks. As you can see, any of the methods mentioned above will resolve the issue. If you’re new to QuickBooks or trying to fix the issue manually, we recommend that you use the following methods under the guidance of a technician or expert.